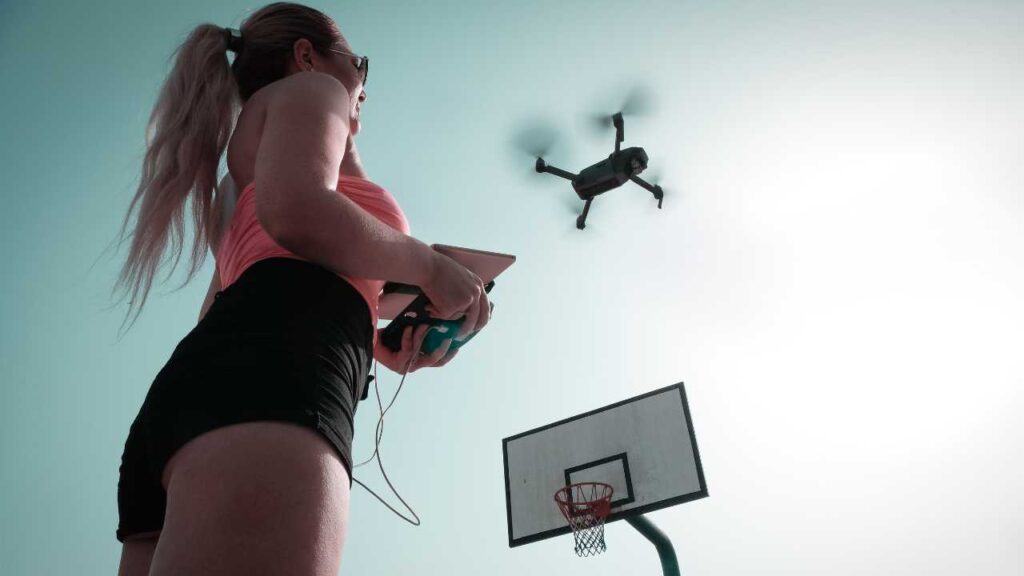
Now you’ve got your new drone. So how to fly a drone safely?
One quick answer is: know your left and right control sticks. Most beginners crash their drone as they mix up both sticks in emergencies.
The second thing you should familiarise yourself with is: focus on your drone, but not on the screen. Accidents happen when a pilot is focused on the screen to get the best shot. But he or she doesn’t notice the drone approaching a power line or tree.
I’ve spent dozens of hours taking a variety of drone training courses to fly my drone properly and safely. I have also assisted dozens of people with their first drone flight.
Follow this guide. By the end, you will have complete confidence flying your drone. Your amazing drone journey starts from here!
If you still don’t know which drone to buy, here is an ultimate Drone Buying Guide. It will guide you step by step to buy your first drone.
Table of Contents
#1 Drone Controls
Glossary to learn how to fly a drone:
| Line of Sight | The pilot can physically see his or her drone during flight. |
| FPV | First Person View. You can access an FPV of your drone by looking through the drone camera. |
| Headless Mode | The drone will turn left when you press the control stick to the left, even if the drone’s head is facing you. The same applies to the right, of course. |
| Return to Home | The drone will return to the home point by itself in case of signal loss or low battery. |
| Bank Turn | A smooth circular turn either clockwise or counterclockwise. |
| Hover | Remaining in the same position during flight. |
| Figure 8 | Flying in a “Figure 8” pattern. |
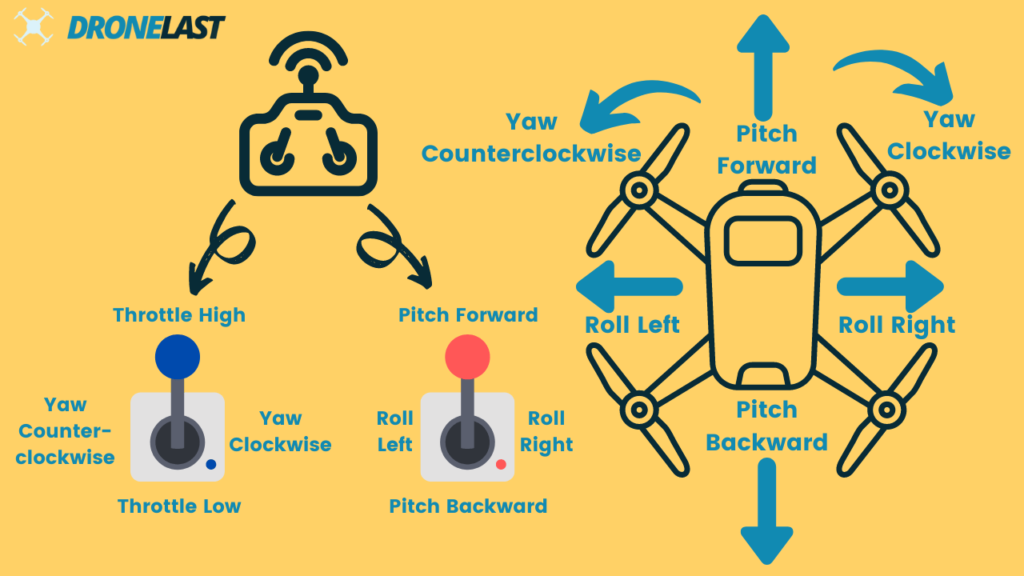
The drone’s movements are based on these four essential controls.
Roll
It means the movement of the drone to the left or right. By default, you can control it by pressing the right stick to the left or right. The harder you press, the faster your drone will fly. It is very similar to playing video games with a controller.
It’s called a roll because the drone rolls a little to slide to the side.
Pitch
It means forward or backward movement. By default, you can control it by pressing the right stick up or down. With Roll and Pitch, you can control your drone to fly in all directions at the same altitude.
Similar to roll, the drone’s head lowers slightly as it moves forward. The reverse is true when moving backwards.
Yaw
It means clockwise or counterclockwise rotation. By default, you can control it by pressing the left stick left or right.
Beginners always confuse yaw with roll. You will find yourself wanting to move your drone sideways, but it turns out that it is rotating. This can be dangerous, as a drone cannot avoid obstacles by yawing.
Usually, you don’t need yaw to reach your destination. It’s mainly for camera movement.
Throttle
It means upward or downward movement. By default, you can control it by pushing the left stick up or down.
Like yaw and roll, beginners easily confuse throttle with pitch. It takes time for any pilot to become familiar with these four controls.
Why is your drone moving in the opposite direction?
If you notice your drone moving in the opposite direction mid-flight, don’t panic. Your drone is not malfunctioning or out of control. It simply has its head turned towards you.
When the drone’s head is facing you, all the controls move in the opposite direction. If you push to the left, the drone will go to the right. Beginners should try not to fly the drone in the opposite direction for the first few flights. Because this can be confusing.
Some drones are equipped with a headless mode. This detects the position of the controller. The drone can then move in the exact direction the stick is pointing. Even if the drone’s head is facing the pilot, it will move to the left when the pilot presses left.
While it’s a user-friendly feature, I recommend beginners not rely on it too much. Being able to recognise a drone’s orientation and control it accordingly is a useful technique. Not just because it allows you to perform certain flying tricks and camera movements. Chances are you’ll be flying a drone without headless mode in the future.
#2 Weather Conditions
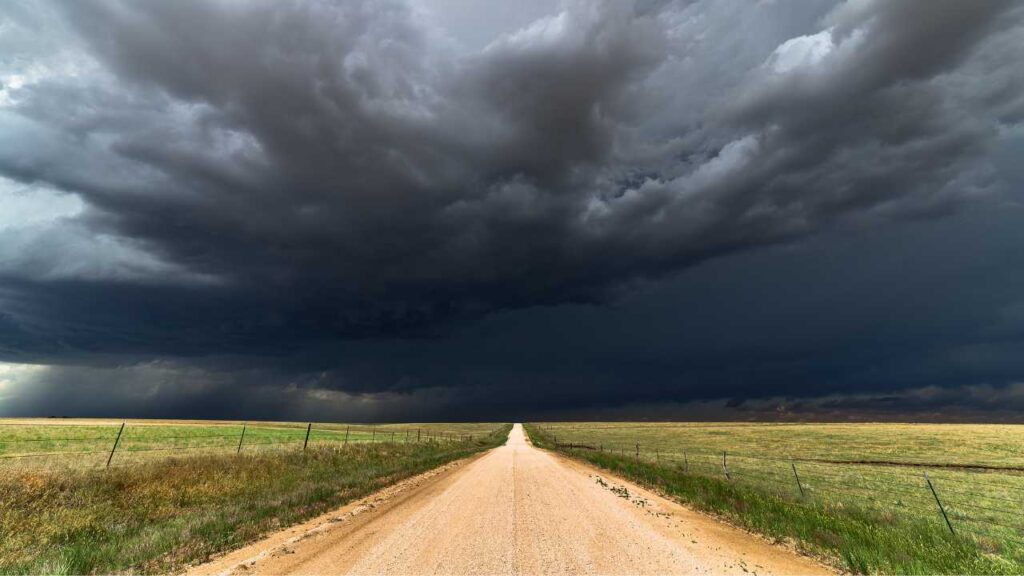
Don’t fly on windy and rainy days, right? Yes. But as a pilot, you have many more worries than that. First, beware of cold weather.
How to Fly a Drone in Low Temperatures
The cold doesn’t affect the drone itself. It shortens the battery life. You will find that your drone will quickly run out of battery in low temperatures. This can result in the drone not being able to take off. In the worst-case scenario, your drone may lose power in the air before you know it. The result could be catastrophic.
So warm up the battery before you insert it into your drone and fly. But how? There are a few simple methods.
- If you’re wearing a coat, put your batteries in your pockets on the way to the flight zone.
- If you have a car, put your batteries on the foot heater under the seat.
- Warm your batteries with hand warmer packs. Be careful not to overheat them.
- Not sure if the weather is too cold for your batteries to operate? Hover your drone at a low altitude for a few minutes. The rate at which the battery level drops will give you a sign.
How to Fly a Drone in Windy Conditions
If it’s very windy outside, say over 15 miles per hour, avoid flying your drone. If you’re flying a larger drone like the DJI Inspire, you’ll have a wider buffer of 20 to 25 miles per hour.
You risk your drone spinning out of control in high winds. There is also an added risk when taking off and landing. If your drone doesn’t stay upright during either of these operations, its propellers will hit the ground.
Also, your drone’s battery life will run out much faster in high winds. This is because your device is expending extra energy to stabilise itself. You may not be able to fly your drone back as planned.
Even if your drone can take off and fly, the images and videos your drone captures may be shaky. It’s just not worth it.
You can check the wind speed with a mobile app. If you’re a little more experienced, you can even feel the wind speed by letting your drone yaw. If it’s slower than usual, the wind may be too strong for your drone to fly.
How to Fly a Drone in the Rain
Many pilots think that their drone is waterproof. Unfortunately, it isn’t. Although the plastic frame is not affected by raindrops, the electronics inside are.
Even if your drone flies normally in light rain, that doesn’t mean it’s good in the rain. There are exposed wires inside the rotors. If too much water gets in, the copper will rust.
Remember to check the weather app before and during your flight. The Apple Weather app has already integrated the features of Dark Sky, a professional weather app that was widely popular among drone flyers. Nowadays the built-in weather app of iPhone or Android should be able to send you severe weather warnings in advance.
Use the Return to Home Function
If the weather unexpectedly changes or you encounter a fault, simply trigger the RTH (Return To Home) function. Your drone will fly itself back to the starting point and hover at a certain altitude. You can change the hover height in the settings.
#3 Preflight Checklist
Weather is not the only thing you should consider before you take off. What else?
First, check if you need to register your drone or if you need a drone license to fly. Once you have done this, you can get ready for your flight!

Here is a complete preflight checklist. You can copy it into the note on your phone for reference.
At home:
- Check the location
- Identify launch site
- Bring permits (If need be)
- Batteries, controller and phone are charged
- Check propellers and rotors
- Insert memory card
- Update firmware
- Bring spare batteries, power bank for phone, and propellers
At the deployment site:
- Reach the launch site
- Connect the drone to the controller
- Check GPS and signal strength
- Warm up the battery if necessary
- Check propellers and rotors
- Calibrate the drone
- Set the home point
What Should You Do Before You Leave Home?
- Check the location with the FAA official B4UFLY app to make sure you can fly there.
- Use the satellite view in B4UFLY or Google Map to find an ideal place to take off and land.
- Bring permits with you if necessary.
- Make sure the batteries, controller, and cell phone are fully charged.
- Check that the propellers and rotors are working properly. Propellers could wear out after dozens of flights. You need to make sure they are intact every time you take off. Because if just one propeller is broken, the whole drone will steer to one side and crash. A quadcopter must fly with 4 propellers.
- Put a memory card in your drone before you fly. It’s a good habit to empty the card after you transfer the footage to your computer. Then put it right back in your drone in case you forget.
- Make sure the firmware is up to date. It will save you a lot of time to update it somewhere with wifi connection than out there with cellular data.
- Bring a cell phone power bank, spare batteries, propellers, and memory cards if needed.
What Should You Do Before You Take Off?
- Identify the launch site. Make sure it is suitable for take-off and landing.
- Connect your drone to the controller. Remember to turn on the controller first, then the drone.
- Check the signal strength and status of GPS. If there is interference, change locations. Interference can be caused by poles, power lines, metal, cars, buildings or others.
- In cold weather, make sure the battery is warm.
- Recheck the propellers and rotors.
- Calibrate your drone. You may need to calibrate the drone’s compass by rotating it 360 degrees, followed by another 360 degrees on its side. This tells the drone that up is up, down is down, right is right, left is left.
Your drone app will guide you on how to do the calibration exactly as it depends on the models. When performing the calibration, stay away from metal and concrete objects. They may interfere with the calibration. - Set the home point. This way, your drone will fly itself back to that point if it loses signal or runs out of battery.
You can also set the altitude of the home point so that your drone flies back and hovers.
For example, if you are flying in a wooded area, you may want to set the home point to a higher altitude. This will help your drone steer clear of trees on the return flight.
#4 Take Off, Fly and Land
Takeoff is no doubt the most exciting moment for a first-time flyer! But first, find an open area to take off. You need to launch on a flat surface so your drone doesn’t take off at a weird angle.
Even for some experienced pilots, takeoff and landing are difficult. A slight tilt of the drone can cause the propellers to hit the ground and crash.
Take Off Automatically
Press the launch button on your screen. Your drone should take off automatically. Beginners should use automatic takeoff until they gain some experience.
Auto takeoff is made possible by the sensors on the bottom of your drone. One of them emits sound waves and the other receives them. This way, the drone detects the distance to the ground and can take off and land stably.
Manual Takeoff
Push both sticks down at the same time. Then push both sticks outward – the left stick to the left, the right stick to the right. All rotors should then start to turn.
It’s tempting to try launching manually since automatic launch looks so easy. Yet, the manual launch is more difficult than you thought. That’s because you need to carefully control the takeoff speed. Lifting off too fast or too slow can cause an imbalance and crash.
Flight Modes
Many drones have three flight modes:
GPS Mode
- The most commonly used mode. Also known as Standard mode or Normal mode.
- The drone uses a satellite to locate itself, which greatly improves its movement.
- When you press the control stick, the drone moves. When you stop pressing it, the drone hovers. This makes it easy to control.
- You can locate your drone in the flight app.
- You can also set a flight path before you fly. This way, your drone will fly autonomously according to the preset path.
- Under the GPS mode, sometimes there are a few sub-modes that you can choose from. For example, a Sport mode where your drone flies faster. Or a Cinematic mode where your drone flies slower and smoother.
ATTI (attitude) Mode
- The drone does not locate itself with GPS in this mode. It cannot hover in the same position when you take your hands off both sticks.
- The drone can fly at the same altitude smoothly. But it drifts around in the wind. That means it doesn’t have an automatic brake. You have to push the control stick to the opposite side to brake.
- For example, if you push up on the right control stick and then release it, your drone will move forward and then continue to slowly glide forward. Your drone will not stop immediately as it does in GPS mode. Instead, your drone will continue to move forward with inertia.
Intelligent Mode
- Also known as Hands Free mode, Simple mode or Carefree mode.
- This includes several special flight paths that your drone can perform autonomously.
- For example, a “Follow Me” mode prompts your drone to follow a specific object. Or an “Orbit” mode where your drone orbits a specific object.
- These modes allow beginners to easily perform difficult shooting tricks.
First Person View (FPV) Mode
- FPV, or First Person View, means experiencing the flight through the drone’s camera in real-time, offering a unique perspective as if you’re in the cockpit.
- This mode utilizes a camera on the drone, transmitting live footage to a screen on your controller or to specialized FPV goggles, immersing you in the action.
- Experiencing FPV is comparable to being inside a video game or virtual reality, providing a firsthand look at the drone’s flight path and surroundings.
- Often employed for precision tasks, FPV shines in drone racing, freestyling, and crafting cinematic shots, thanks to the pilot’s direct view from the drone.
- Mastering FPV demands a higher skill level, as pilots must navigate the drone based solely on the camera’s feed, without seeing the drone itself.
- FPV isn’t limited to just one flying style; it’s versatile, allowing for use in both normal and acro (manual) flight modes, the latter offering enhanced control for adept pilots.
- Prioritizing safety while flying in FPV mode is crucial to prevent accidents, emphasizing the importance of responsible flying practices.
How to Land Safely?
You can switch between different flight modes while flying. But you should be aware of the difference in control.
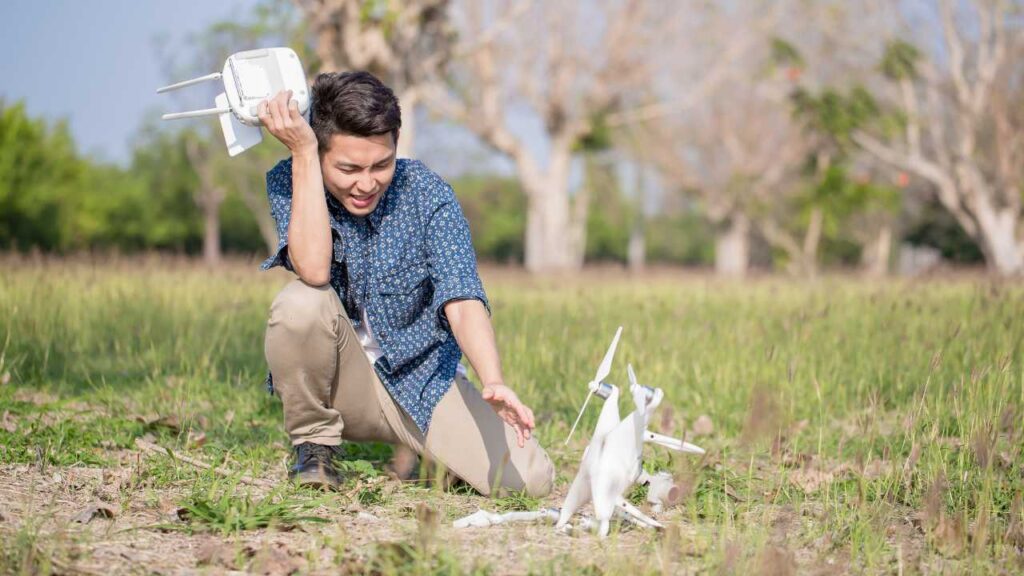
Like launching, you can choose to land automatically or manually. Although you can fully rely on auto takeoff, you can’t be so sure when it comes to landing. Everyone should learn manual landing in case of emergencies.
Landing Automatically
When you land automatically, you lower your drone to the lowest altitude it can reach. Many drones prevent further lowering at 3 to 5 feet above the ground. Then you can press the auto-landing button to ask the drone to land automatically.
Landing Manually
If you are landing manually, do the same by hovering the drone 3 to 5 feet above the ground. Then, transition to descent bit by bit. Being slow is key.
When you are sure that your drone has fully touched down on the ground, stop the rotors. Pull both control sticks down and then inward toward each other. All rotors should be cut off immediately.
Land on a Flat, Open Surface
Land on a flat open area. Land on a soft surface such as grassland. If your drone tilts slightly, the propellers may hit the rocks on the ground. Or the propellers may break at high speed and scatter everywhere. This can lead to injuries.
Watch Out for Overhead Obstacles
Sometimes you may be too relaxed at the end of the flight mission. Or you may be in a hurry to swap batteries. In either situation, you may be distracted and not aware of the obstacles above.
Common obstacles include power lines, streetlights, and tree branches.
Use a Landing Pad
Some people like to play it safe by using a landing pad. Its sole purpose is to warn people not to step into the landing zone. Deploy one if you envision your launch site is busy.
Don’t Linger When It’s Time to Land
When the battery is running low, say only 30% left, you should return and prepare to land. Otherwise, your drone will return to the home point and land automatically when the battery is at 10% or less.
If there are battery anomalies, such as a rapid drop in battery level, do not risk flying. Land and inspect the drone immediately.
If your drone is out of control or shows a significant delay in response, return and check it. Interference may come in a sudden.
Last but not least, be prepared to land in bad weather.
#5 Roadmap to Flying a Drone
Many beginners want to learn to fly and shoot at the same time. But you should really master the flying, followed by the shooting. Flying a drone is one skill, taking great shots is another.
You should have learned the basics from the instructions above. Try to achieve the following milestones to build your confidence.
1.
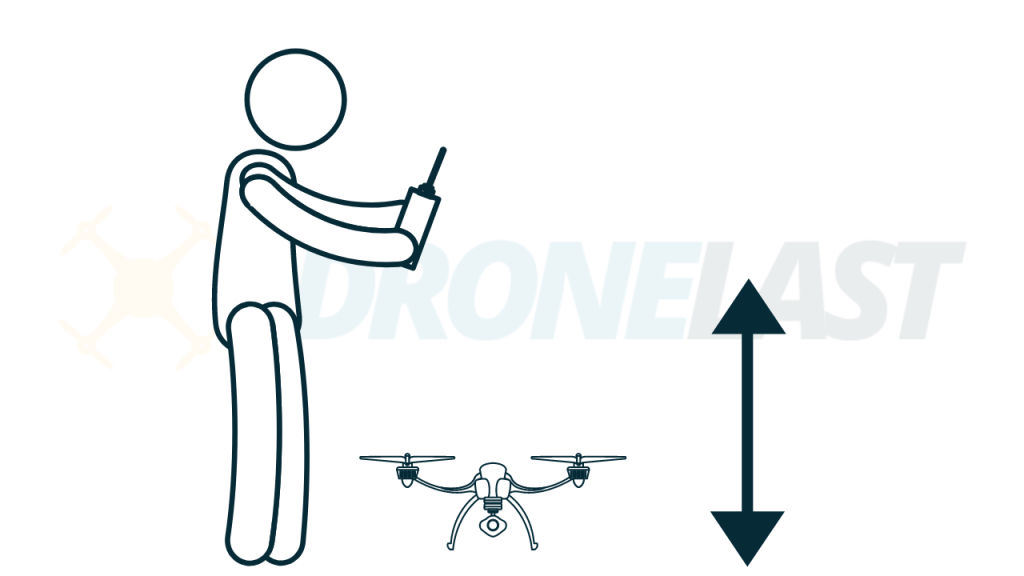
Take off to about 5 feet off the ground. Then land slowly. Do this twice.

Use automatic takeoff and landing if your drone has it. Manual is an advanced skill and you can practise it when you are more familiar with controls.
2.
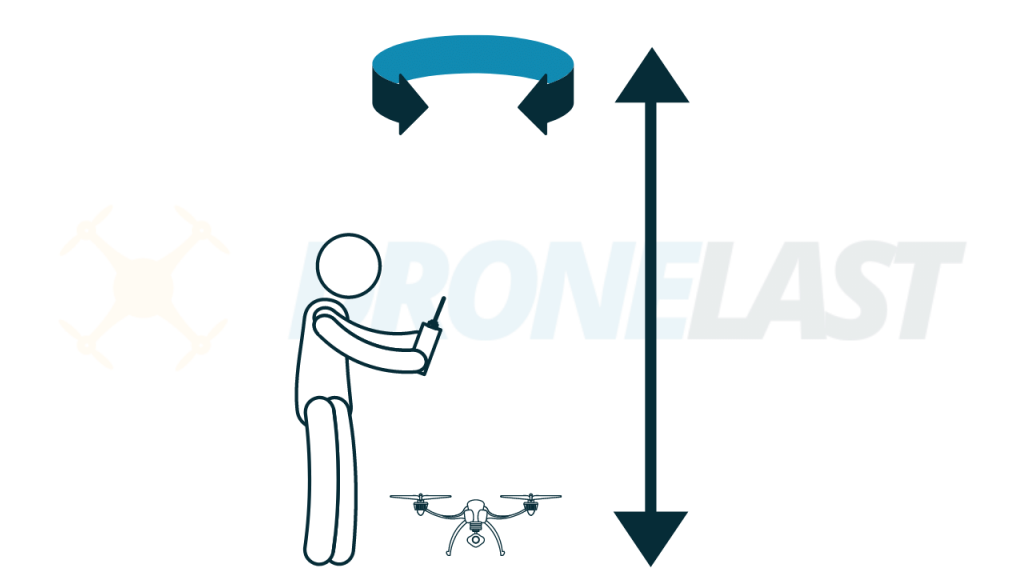
Take off to about 10 feet above the ground. Rotate it clockwise 360 degrees. Then rotate it counterclockwise another 360 degrees. Make sure the tail of the drone is facing you.
3.
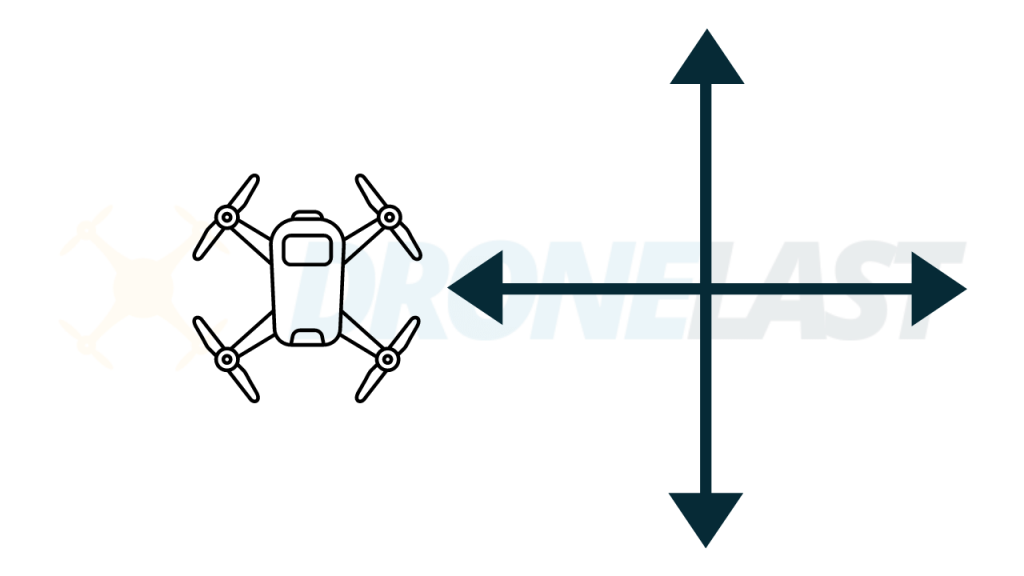
Still 10 feet off the ground with the tail facing you. Roll the drone a few feet to the right. Turn it back to the left. Pitch it forward for a few feet. Then pitch it back.
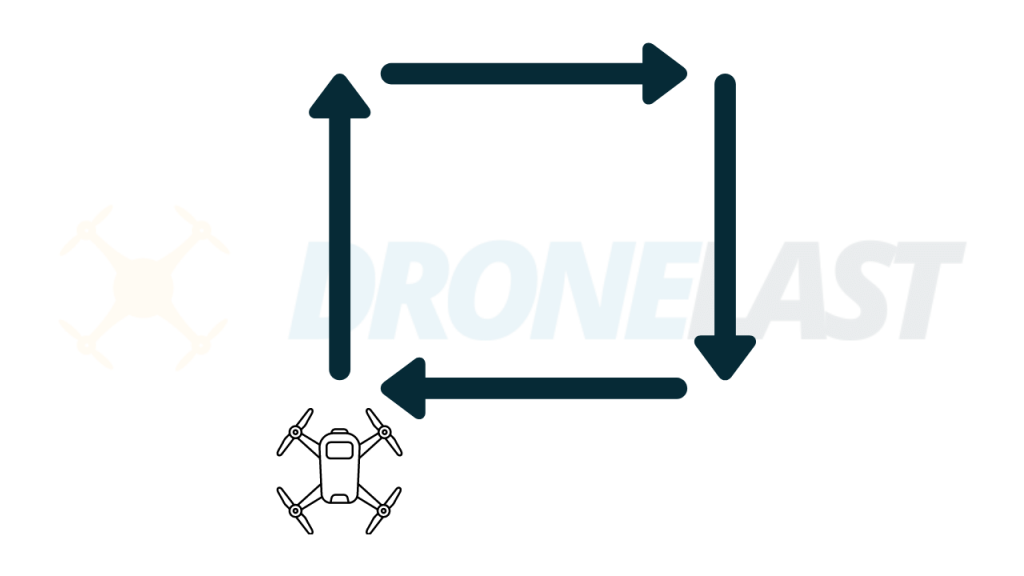
You've already learned all the basics. Now it's time to fly a course.

Use only the right control stick, i.e. with pitch and roll, to draw a square with your drone.
5.
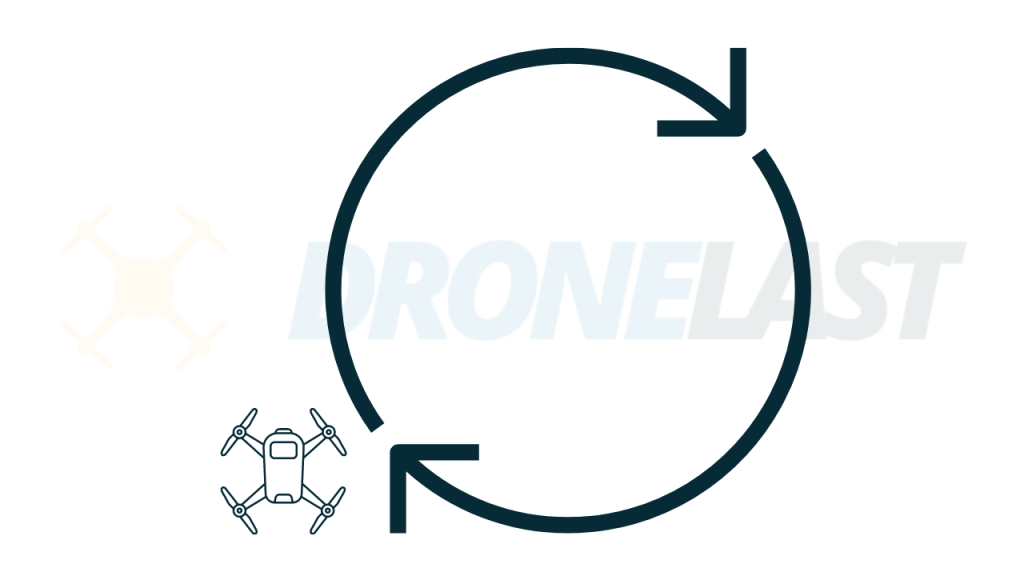
Again, use only the right stick. This time draw a circle. You will find that this is a little more challenging. It requires smoother control of the stick.
6.
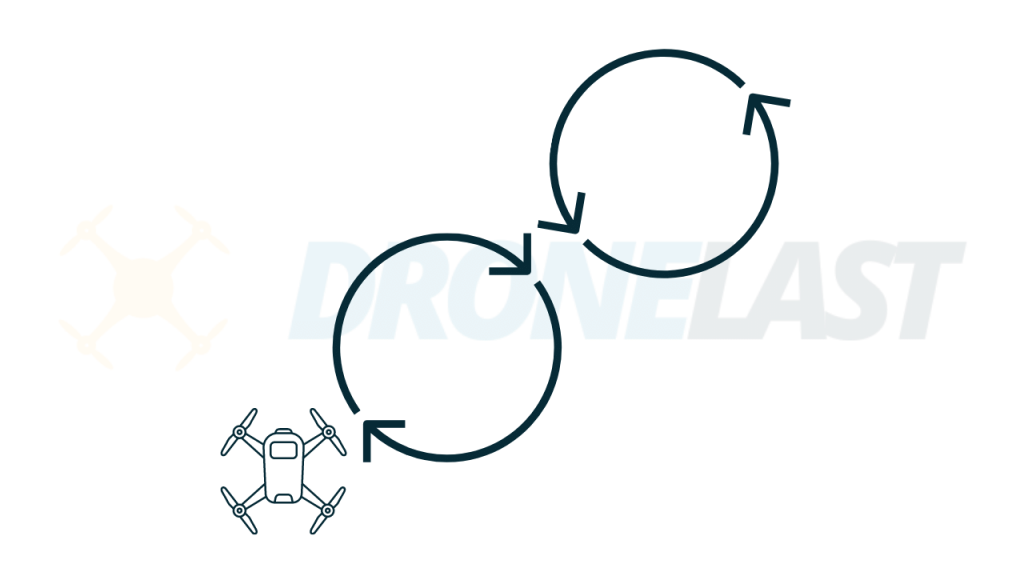
Once you have mastered the circle, try figure 8. It’s like drawing two circles continuously but in a different direction.
7.
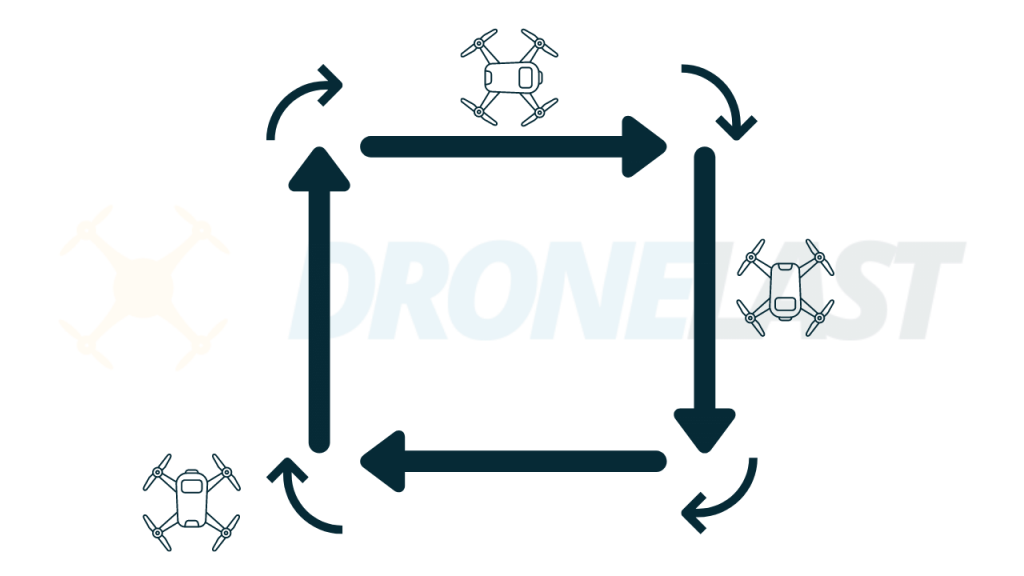
Bravo! Now it's time to take on a slightly bigger challenge. Fly your drone in a square.

But this time, guide the square with your drone's head. That means you need to yaw your drone 90 degrees at each corner and then pitch it forward to draw the line.

Can you feel the coordination required between the left and right control sticks? Are you confusing yaw with roll? Don't worry, we've all been there!
8.
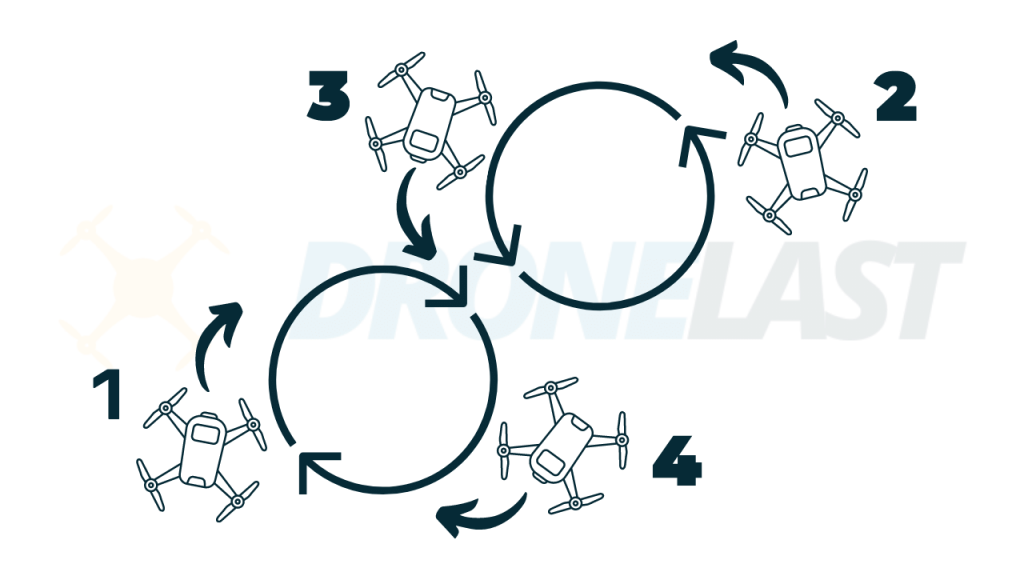
You're almost there! Last but not least, draw a figure 8 again. This time, draw it with your drone's head. This requires a certain amount of coordination of both hands.

This can be quite a challenge for a beginner. Make sure there are no obstacles nearby.

If you get confused or panic, release both sticks to hover the drone. Pause for a second until you understand the sense of the controls.
Congratulations to those who have mastered all 8 exercises above! You should now have developed a good feel for controlling the drone, especially the coordination between the two sticks.
#6 How to Take Pictures With Your Drone?
As I said, learning how to fly a drone is one skill, learning how to take photos is another. So, how do you shoot photos and videos with your camera drone?
You can simply use Pitch, Roll, Yaw and Throttle to frame your shot. Imagine your drone is a moving tripod in the air.
Some beginners thought they could control the gimbal to adjust the frame. But they can’t. The gimbal is there to stabilise the camera so the shot doesn’t get shaky. It’s like the shockproof function in a camera.
However, there is one camera movement that you can control with the gimbal, which is tilting up and down. For example, you want to shoot a landscape from a bird’s eye view. You can tilt the camera down 90 degrees and then slowly pitch the drone forward to take the shot.
Light Is the Key
One thing to keep in mind is that the sensor on a drone camera is small. This means that light plays a big role. If you shoot in good light, you will get a much better shot. Shooting at the magic hour, which is the hour of sunrise or sunset, is a good option.
Frame Your Pictures or Videos
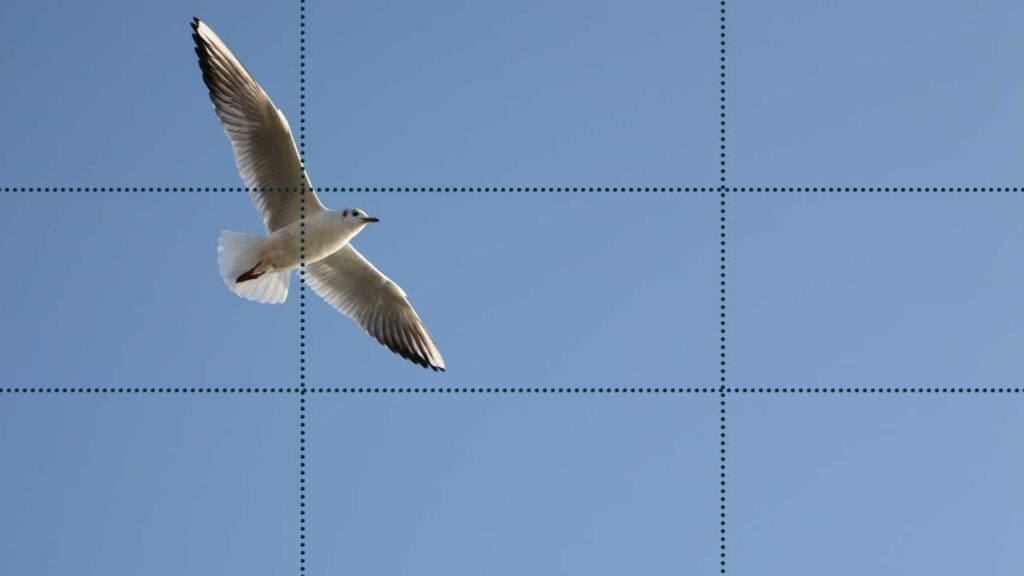
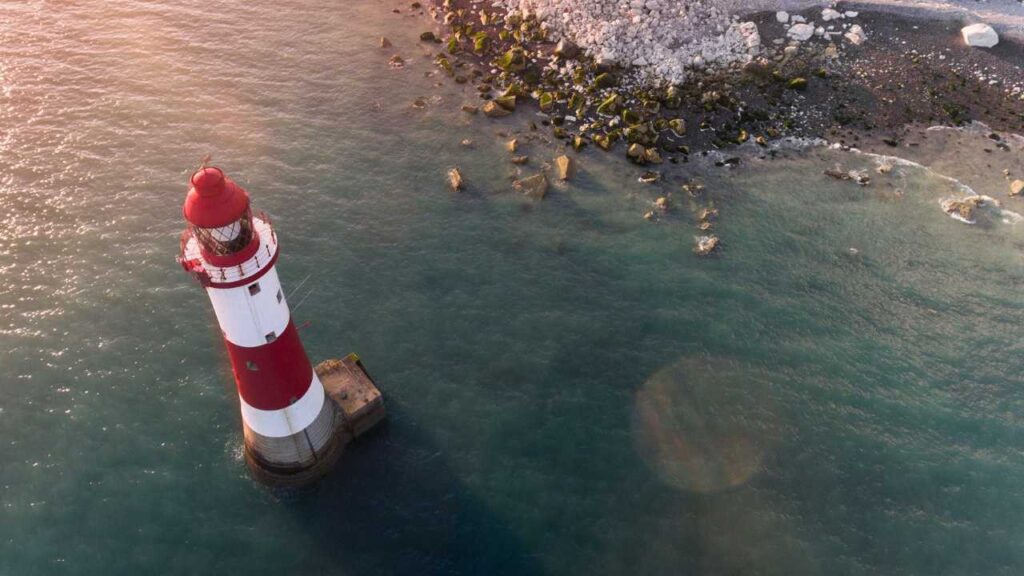
It’s not difficult to get stunning shots, provided the location is scenic. If you want to develop your photography or videography skills, you need to improve your framing skills.
Here are some basics:

Don’t Lose Sight of Your Drone
Drone photography is different from traditional photography. You are not only the photographer but also the pilot. It’s easy to ignore the role of the pilot when you’re heading towards your camera subject. This is also how accidents happen.
Like the video above, if you’re rolling your drone sideways, you need to keep an eye on it to make sure it’s clear of obstacles to the side!
If you expect the flight to be challenging, form a two-person team before launching. Your partner doesn’t need to know anything about drones or photography. He or she can help you keep an eye on your drone and make sure its path is clear of obstacles.
Also check out our safety tips to fly your drone safely.
What to Do Next?
Now you should have learned more than enough to fly your drone nicely. If you want to practise with a simulator, take a look at Real Drone Simulator. It’s free.
If you want to do some online training, check out these best online drone schools and courses. We highlight all the free resources you can take advantage of.
Have a great time flying!
